DIY Entryway Bench: Organize Shoes for Under $60
Anúncios
Learn how to create a functional and stylish DIY entryway bench with shoe storage for under $60, perfect for organizing your home on a budget.
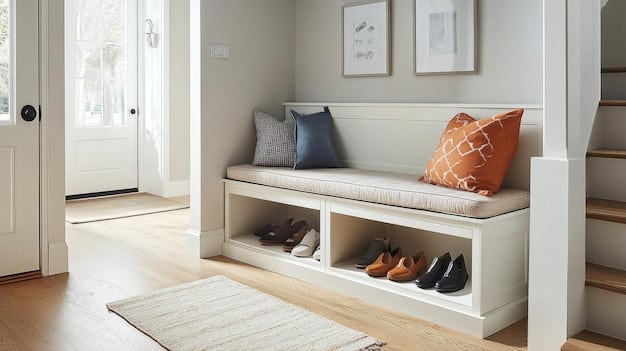
Tired of tripping over shoes the moment you walk in the door? A Get Organized: DIY Entryway Bench with Shoe Storage for Under $60 is the perfect weekend project to solve that problem and add a touch of style to your entryway.
Anúncios
Plan Your DIY Entryway Bench Project
Embarking on a DIY project requires careful planning to ensure a smooth and successful outcome. Creating a entryway bench with shoe storage is no exception, and proper planning can help you avoid costly mistakes and frustration.
From gathering the necessary materials to designing a functional and aesthetically pleasing bench, this section will guide you through the essential steps to kickstart your project.
Anúncios
Assess Your Entryway Space
Before you start building, take accurate measurements of your entryway. Consider the available width, depth, and height to determine the ideal dimensions for your bench. Think about traffic flow and how the bench will fit into the overall space without obstructing movement.
Determine Storage Needs
Evaluate the number of shoes you need to store and the types of items you want to keep on or near the bench, such as bags, hats, or umbrellas. This will help you decide on the size and configuration of the shoe storage compartments.
- Consider open shelving for easy access.
- Think about hidden compartments for less frequently used items.
- Plan for adequate ventilation to prevent odors.
Finally, creating a detailed plan that considers both your space and storage needs sets the stage for a successful DIY project.
Gather Budget-Friendly Materials
One of the most appealing aspects of this DIY project is its affordability. By carefully selecting materials and utilizing cost-effective strategies, you can build a stylish and functional entryway bench without breaking the bank.
Explore options for sourcing inexpensive lumber, hardware, and finishing products to keep your project under $60.
Explore Lumber Options
Consider using reclaimed wood or affordable lumber like pine or spruce. These materials are readily available at most home improvement stores and offer a good balance of price and durability. Check for imperfections or knots that can add character at a lower cost.
Hardware and Fasteners
Opt for basic screws, nails, and hinges that provide adequate support without unnecessary expense. Look for bulk packs or clearance items to save money. Repurpose existing hardware from old furniture or fixtures if possible.
Choosing inexpensive materials doesn’t mean sacrificing quality or aesthetics. With a little creativity and resourcefulness, you can find budget-friendly options that meet your needs and enhance the look of your entryway bench.
Cut and Assemble the Bench Frame
The foundation of your entryway bench lies in its frame. This section focuses on the essential steps for cutting and assembling the frame components accurately.
By following precise measurements and using the appropriate techniques, you can create a sturdy and well-aligned structure that serves as the backbone of your project.
Accurate Measurements and Cuts
Use a measuring tape, square, and saw to cut the lumber according to your plan. Double-check all measurements before cutting to minimize errors. Use a miter saw for precise angle cuts if needed.
Assemble the Base
Attach the side pieces to the front and back pieces using wood glue and screws. Ensure the corners are square and the frame is level. Use clamps to hold the pieces together while the glue dries.
- Pre-drill holes to prevent the wood from splitting.
- Use wood filler to conceal any gaps or imperfections.
- Sand the frame smooth for a clean finish.
With careful attention to detail and accurate execution, you can create a solid and reliable frame that forms the base of your entryway bench.
Add Shoe Storage Compartments
The primary purpose of your entryway bench is to provide convenient shoe storage. By adding well-designed compartments, you can maximize functionality and keep your entryway clutter-free.
Explore various options for creating shoe storage spaces, considering factors like shoe size, ventilation, and ease of access.
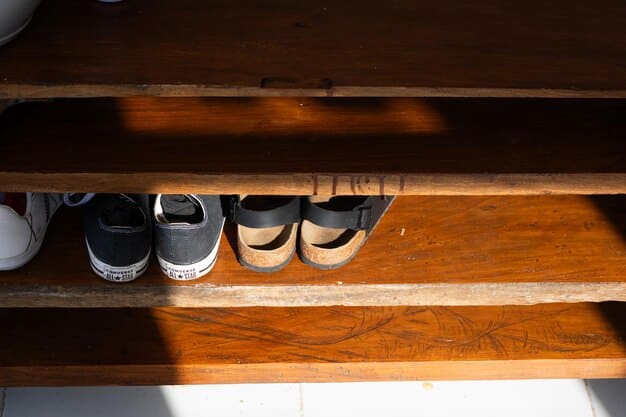
Open Shelving
Install horizontal shelves between the frame pieces to create open shoe storage. Space the shelves according to the height of your shoes. Consider using adjustable shelves to accommodate different shoe sizes.
Dividers and Partitions
Add vertical dividers to create individual shoe compartments. This helps to keep shoes organized and prevents them from piling up. Use thin pieces of wood or plywood for the dividers.
Thoughtfully designed shoe storage compartments not only enhance the functionality of your entryway bench but also contribute to a more organized and visually appealing space.
Finishing Touches and Personalization
The finishing touches are where you can truly make your DIY entryway bench your own. In this section, we’ll explore various options for adding aesthetic appeal and personalizing your project to match your style and preferences.
From painting and staining to adding cushions and decorative hardware, the possibilities are endless.
Painting and Staining
Apply a coat of paint or stain to protect the wood and enhance its appearance. Choose colors that complement your existing décor. Consider using a sealant or varnish for added durability.
Cushions and Upholstery
Add a comfortable cushion to the top of the bench for seating. Choose fabric that is durable and easy to clean. Consider adding decorative pillows for added style.
- Use stencils or paint to add patterns or designs.
- Install hooks or knobs for hanging coats or bags.
- Incorporate storage baskets or bins for smaller items.
The final touches are what truly transform your DIY entryway bench into a personalized and functional piece of furniture that reflects your unique style and enhances your home.
Maintenance and Upkeep
To ensure that your DIY entryway bench with shoe storage remains in excellent condition for years to come, it’s essential to establish a routine of regular maintenance and upkeep.
By taking proactive measures to protect and care for your bench, you can prolong its lifespan and maintain its aesthetic appeal.
Regular Cleaning
Wipe down the bench regularly with a damp cloth to remove dust and dirt. Use mild soap and water for tougher stains. Avoid using abrasive cleaners that can damage the finish.
Protecting the Finish
Apply a coat of furniture polish or wax periodically to protect the finish from scratches and moisture. Use coasters or mats to protect the surface from spills and stains. Avoid placing the bench in direct sunlight, which can cause fading or warping.
Maintaining your DIY entryway bench is a simple way to safeguard your investment and continue enjoying organizational benefits for years to come.
| Key Point | Brief Description |
|---|---|
| 📏Space Planning | Measure your entryway accurately for ideal bench dimensions. |
| 💰Budget Materials | Use reclaimed wood or affordable lumber like pine. |
| 👟Shoe Storage | Create open shelves or divided compartments for shoe organization. |
| 🎨Personalization | Add paint, cushions, or hardware to match your style. |
Frequently Asked Questions
▼
You’ll need a saw, measuring tape, drill, sandpaper, wood glue, screws, and safety glasses. A miter saw can be helpful, but a hand saw will also work.
▼
Use thicker lumber for the frame, reinforce the corners with metal brackets, and ensure all joints are securely fastened with glue and screws.
▼
Yes, you can use different types of wood based on your budget and aesthetic preferences. Pine and spruce are affordable, while oak and maple are more durable but expensive.
▼
Apply a waterproof sealant or varnish to the wood to protect it from moisture. Ensure the shoe storage area is well-ventilated to prevent mold and mildew.
▼
Consider adding a backrest, drawers, or a hinged seat for hidden storage. You can also customize the size and shape of the shoe compartments to accommodate different shoe types.
Conclusion
Creating a Get Organized: DIY Entryway Bench with Shoe Storage for Under $60 is a rewarding project that not only enhances your home’s organization but also adds a personal touch. With careful planning, budget-friendly materials, and a little elbow grease, you can transform your entryway into a functional and stylish space that welcomes you home every day.


