Maximize Space: DIY Murphy Bed Under $400 – Step-by-Step Guide
Anúncios
Maximize Small Spaces: Build a DIY Murphy Bed for Under $400 by following this step-by-step guide, which outlines the planning, material selection, construction, and finishing touches needed to create a functional and stylish space-saving solution.
Struggling with limited living space? Discover how to Maximize Small Spaces: Build a DIY Murphy Bed for Under $400, a practical and affordable solution to reclaim your room without breaking the bank.
Anúncios
Why Build a DIY Murphy Bed?
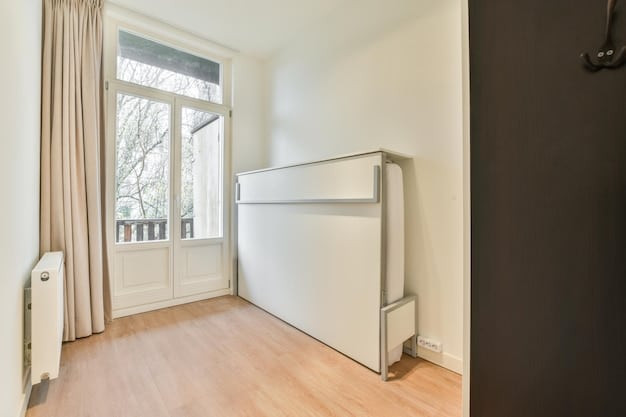
Building a DIY Murphy bed is an excellent way to efficiently use space in a small home, apartment, or studio. It offers a dual-purpose solution, transforming a living area into a bedroom with minimal effort.
A DIY approach allows for customization to fit your specific needs and preferences, all while saving money compared to purchasing a pre-made Murphy bed.
Anúncios
Benefits of a DIY Murphy Bed
Opting for a DIY Murphy bed has several advantages. Here are some key benefits:
- Cost-effective: Building your own Murphy bed can be significantly cheaper than buying one from a store.
- Customization: You can tailor the design, size, and finish to match your existing decor and space requirements.
- Space-saving: Murphy beds fold away when not in use, freeing up floor space for other activities.
- Skill development: This project is a great way to improve your woodworking and DIY skills.
A DIY Murphy bed is not just about saving space; it’s about creating a versatile living environment that adapts to your lifestyle. By building your own, you gain control over every aspect of the design, ensuring that it meets your specific needs and aesthetic preferences.
Planning Your Murphy Bed Project
Proper planning is essential for a successful DIY Murphy bed project. This involves measuring your space, choosing the right materials, and creating a detailed design.
Careful planning will help you avoid costly mistakes and ensure that your finished Murphy bed is both functional and aesthetically pleasing.

Measuring Your Space
Accurate measurements are crucial. Measure the height, width, and depth of the space where you plan to install the Murphy bed. Consider any obstructions, such as windows, doors, or electrical outlets.
Also, think about the clearance needed for the bed to fold down properly. Measure the distance from the wall to any furniture that might obstruct the bed’s movement.
Choosing the Right Materials
Selecting the right materials is key to the durability and appearance of your Murphy bed. Here are some common options:
- Plywood: A cost-effective and versatile material for the bed frame and cabinet.
- Hardwood: Provides a sturdier and more attractive finish for the face of the cabinet.
- Murphy bed hardware kit: Includes the necessary mechanisms for folding the bed up and down safely and smoothly.
- Fasteners: Screws, nails, and bolts for assembling the bed frame and cabinet.
Consider the aesthetic you want to achieve and choose materials that complement your existing decor. Don’t compromise on quality, as the durability of your Murphy bed depends on the strength and reliability of the materials used.
By carefully planning and selecting the right materials, you set the stage for a successful and satisfying DIY project.
Essential Tools and Materials
Before starting your DIY Murphy bed project, gather all the necessary tools and materials. Having everything on hand will streamline the construction process and prevent delays.
Ensure that your tools are in good working condition and that you have a sufficient supply of materials to complete the project without interruptions.
Tools You’ll Need
Here’s a list of essential tools for building a DIY Murphy bed:
- Measuring tape: For accurate measurements.
- Circular saw: For cutting large sheets of plywood.
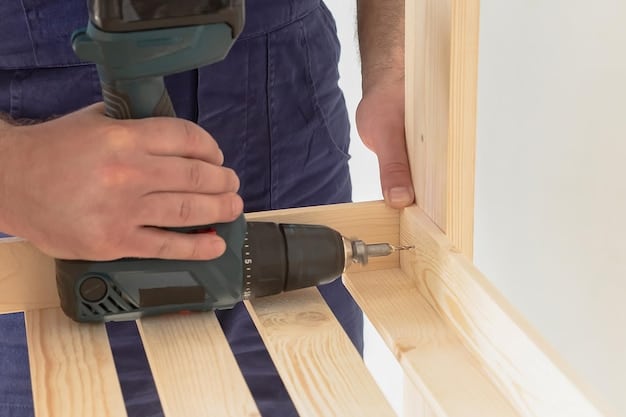
- Drill: For drilling pilot holes and driving screws.
- Sander: For smoothing rough edges and surfaces.
- Level: For ensuring the bed and cabinet are level.
- Clamps: For holding pieces together while gluing and screwing.
Investing in quality tools will not only make the project easier but also ensure a more professional-looking finish. Consider renting or borrowing tools if you don’t already own them.
Material List (Approximate)
Here’s an approximate list of materials needed for the project. Adjust quantities based on your specific design and measurements. Also, remember to confirm that the lumber sizes are accurate, as lumber dimensions can vary from store to store.
- Plywood (4′ x 8′ sheets): 3-4 sheets
- 2×4 lumber (8 ft): 6-8 pieces
- Murphy bed hardware kit: 1 kit
- Wood screws (various sizes): 1 box
- Wood glue: 1 bottle
- Finishing materials (paint, stain, varnish): As desired
Always buy a little extra material to account for mistakes or unexpected design changes. It’s better to have too much than to run out in the middle of the project.
With the right tools and materials, you’ll be well-equipped to tackle the challenges of building your own Murphy bed and achieve a satisfying result.
Building the Bed Frame
The bed frame is the foundation of your Murphy bed. It needs to be sturdy and well-constructed to support the weight of the mattress and occupants safely.
Take your time and pay attention to detail when building the bed frame to ensure its durability and stability.
Cutting the Wood
Using your measurements and design plans, cut the 2×4 lumber and plywood to the required sizes. It’s a good idea to double-check measurements before cutting to avoid mistakes.
Use a circular saw for straight cuts and a jigsaw for any curved or intricate designs. Always wear safety glasses and a dust mask when cutting wood.
Assembling the Frame
Assemble the bed frame using wood screws and wood glue. Make sure the frame is square and level before securing the joints.
- Start by attaching the side rails to the head and foot boards.
- Reinforce the corners with angle brackets for added strength.
- Add center supports to prevent the mattress from sagging.
Use clamps to hold the pieces together while the glue dries. This will ensure a strong and durable bond. Allow the glue to dry completely before moving on to the next step.
A well-built bed frame is essential for the safety and comfort of your Murphy bed. Take your time and ensure that every joint is secure and properly aligned. A good frame will make the bed last for years to come.
Installing the Murphy Bed Mechanism
The Murphy bed mechanism allows the bed to fold up and down smoothly and safely. Proper installation of the mechanism is crucial for the functionality of the bed.
Follow the manufacturer’s instructions carefully and double-check all connections to ensure that the mechanism is securely attached to the bed frame and cabinet.
Attaching the Hardware
Attach the Murphy bed hardware kit to the bed frame according to the manufacturer’s instructions. Use the provided screws and bolts to secure the hardware in place.
Make sure the hardware is properly aligned and that all connections are tight. This will ensure smooth and reliable operation of the bed.
Installing the Piston System
Most Murphy bed mechanisms use a piston system to assist with lifting and lowering the bed. Install the pistons according to the manufacturer’s instructions.
- Attach one end of the piston to the bed frame and the other end to the cabinet.
- Make sure the pistons are properly aligned and that they move smoothly.
- Adjust the tension of the pistons as needed to balance the weight of the bed.
Test the mechanism by folding the bed up and down several times. If the bed is difficult to lift or lower, adjust the tension of the pistons until the movement is smooth and effortless.
Proper installation of the Murphy bed mechanism is essential for the safety and convenience of your bed. Take your time and follow the instructions carefully to ensure that the mechanism operates smoothly and reliably. The last thing you want is a collapsed or impossible-to-lower murphy bed.
Building and Installing the Cabinet
The cabinet houses the Murphy bed when it is not in use. It serves as a decorative element in the room and provides support for the bed when it is folded up.
Build the cabinet with care, paying attention to detail and ensuring that it is strong and sturdy enough to support the weight of the bed.
Constructing the Cabinet
Using plywood, cut the pieces for the cabinet according to your design plans. Assemble the cabinet using wood screws and wood glue.
- Start by attaching the side panels to the top and bottom panels.
- Reinforce the corners with angle brackets.
- Add a back panel for added stability.
Attaching the Cabinet to the Wall
Attach the cabinet to the wall using heavy-duty screws and wall anchors. Make sure the cabinet is level and securely fastened to the wall studs.
Use a stud finder to locate the wall studs and drill pilot holes before driving in the screws. This will prevent the wood from splitting and ensure a strong connection.
Finishing Touches
Once the cabinet is installed, add the finishing touches, such as doors, trim, and hardware. Paint or stain the cabinet to match your existing decor.
Consider adding decorative elements, such as molding, panels, or knobs, to enhance the appearance of the cabinet. Pay attention to detail and take pride in your work.
A well-built and beautifully finished cabinet will transform your Murphy bed into a stylish and functional piece of furniture that enhances the appearance of your home.
| Key Point | Brief Description |
|---|---|
| 📏 Accurate Measurements | Measure space precisely to avoid mistakes and ensure a perfect fit. |
| 🛠️ Essential Tools | Gather necessary tools like saws, drills, and sanders for efficient construction. |
| 🔩 Secure Hardware | Install the Murphy bed mechanism carefully to ensure safe and smooth operation. |
| 🎨 Finishing Touches | Personalize the cabinet with paint, stain, and decorative elements to match your style. |
Frequently Asked Questions (FAQ)
▼
The cost varies depending on the materials you choose and whether you already have some of the necessary tools. However, you can typically build a DIY Murphy bed for under $400 by using cost-effective materials like plywood and standard hardware kits.
▼
The amount of space required depends on the size of the bed and the dimensions of the cabinet. Measure the height, width, and depth of the space where you plan to install the bed to ensure it fits comfortably.
▼
A low-profile mattress is recommended to allow the bed to fold up easily. Memory foam mattresses are a popular choice because they are lightweight and comfortable. Check the maximum mattress thickness specified by your Murphy bed hardware kit.
▼
Building a DIY Murphy bed requires some woodworking skills and attention to detail, but it is manageable for most DIY enthusiasts. With careful planning, accurate measurements, and the right tools, you can successfully complete the project.
▼
Ensure the bed is safe by following the manufacturer’s instructions for the Murphy bed mechanism, securely attaching the cabinet to the wall, and testing the bed’s operation thoroughly. Regular inspection and maintenance will also help ensure its safety over time.
Conclusion
Building a DIY Murphy bed for under $400 is a rewarding project that can transform your small living space. With careful planning, the right materials, and a bit of effort, you can create a functional and stylish space-saving solution that meets your specific needs and budget. Enjoy the process and the final result—a more spacious and versatile home.


