DIY Headboard: Boost Your Home’s Style for Under $90
Anúncios
Transform your bedroom on a budget with our guide to creating a stylish DIY headboard for under $90, enhancing your home’s decor affordably and sustainably.
Ready to upgrade your bedroom without breaking the bank? You can boost your home’s style: DIY headboard project for under $90, is a creative and budget-friendly way to add personality and flair to your sleeping space.
Anúncios
Affordable Style: Why a DIY Headboard?
Many people think that achieving a stylish look in their home requires expensive furniture and professional decorators. However, DIY projects like creating your own headboard prove that you can achieve high-end looks without the high-end price tag. A DIY headboard allows you to customize your bedroom’s style to perfectly match your taste and existing decor, all while sticking to a strict budget.
Beyond the cost savings, DIY headboards offer a unique opportunity to express your creativity. You’re not limited to what’s available in stores; instead, you can choose your own materials, colors, and designs. This means your headboard can be a true reflection of your personal style, making your bedroom feel more like a personalized sanctuary.
Anúncios
The Benefits of DIY
Opting for a DIY headboard project comes with a wealth of benefits beyond just saving money. It’s about creating something unique, tailored to your personal taste, and enjoying the process of making something with your own hands. Here are a few key advantages:
- Cost-Effective: DIY projects significantly reduce costs compared to buying retail.
- Customization: Tailor the design, size, and materials to fit your exact needs and preferences.
- Creative Expression: A chance to showcase your personal style and add a unique touch to your bedroom.
- Sense of Accomplishment: There’s immense satisfaction in creating something beautiful and functional yourself.
In summary, building a DIY headboard is not only an economically sound decision but also a creatively fulfilling one. It allows you to personalize your space while enjoying the satisfaction of crafting something unique.
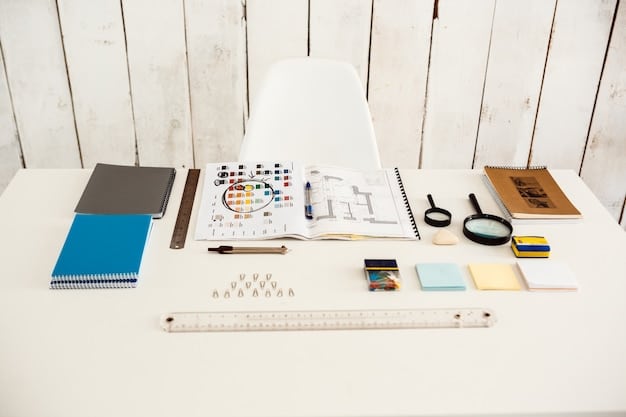
Planning Your Project: Design and Materials
The first step in creating a stunning DIY headboard is to plan your project thoroughly. Start by considering the overall design and the materials you’ll need. Think about the style you want to achieve—modern, rustic, minimalist, or something else entirely. This will guide your choices in terms of materials, colors, and overall design complexity.
Next, think about the scale. The size of your headboard should be proportionate to your bed and the size of your room. Measure your bed frame and consider the height you want your headboard to reach above the mattress. Sketching out your design can be incredibly helpful at this stage, allowing you to visualize the finished product and make any necessary adjustments before you start buying materials.
Choosing the Right Materials
Selecting the right materials is crucial for both the aesthetics and durability of your headboard. Here are some popular and affordable options to consider:
- Wood: Plywood, reclaimed wood, or MDF board can provide a solid base.
- Fabric: Choose upholstery fabric, canvas, or even repurposed textiles like old blankets.
- Foam Padding: Add comfort and a luxurious feel with foam padding.
- Hardware: Don’t forget staples, screws, and brackets for assembly and mounting.
Good preparation is key to the success of your DIY headboard project. By planning your design carefully and choosing the right materials, you can set yourself up for a smooth and enjoyable crafting experience.
Step-by-Step Guide: Building Your DIY Headboard
Now, let’s dive into the detailed steps involved in building your DIY headboard. This guide will walk you through each stage of the process, from cutting the materials to adding the finishing touches. Remember, precision and patience are your best friends during this part of the project.
Before you start, make sure you have all your materials and tools ready. A well-prepared workspace can make the entire process smoother and more enjoyable. Here are the tools you’ll likely need: a saw, staple gun, measuring tape, pencil, and possibly a drill, depending on your mounting method. Safety first: always wear safety glasses and gloves when cutting and stapling materials.
Cutting and Assembling the Base
The first step is to cut your wood base to the desired size. Use your measuring tape and pencil to mark the dimensions on the wood, and then carefully cut along the lines with a saw. Once the base is cut, smooth any rough edges with sandpaper. If your design includes any decorative cutouts or shapes, now is the time to add them.
Next, if your design requires a frame or additional support, assemble it using screws and brackets. Ensure that the frame is sturdy and well-aligned. A solid base is essential for a durable and long-lasting headboard.
Padding and Upholstering
With the base assembled, it’s time to add padding for comfort and visual appeal. Cut the foam padding to fit the base, leaving a slight overhang to ensure complete coverage. Attach the foam to the wood using spray adhesive or staples. Make sure the padding is smooth and evenly distributed.
Now comes the upholstering part, which can elevate your DIY headboard project. Start by laying your chosen fabric on a flat surface, and then center the padded base on top. Begin stapling the fabric to the back of the wood, starting at the center of each side and working your way outwards. Pull the fabric taut as you go to avoid wrinkles and creases. Fold and staple the corners neatly for a professional finish.
In conclusion, by following these detailed steps, you can confidently construct your own stylish and comfortable DIY headboard. Careful cutting, sturdy assembly, and precise upholstering are key to achieving a result you’ll be proud of.
Creative Touches: Customizing Your Headboard
One of the greatest advantages of undertaking a DIY project is the freedom to customize every detail to your liking. When it comes to your headboard, there are countless ways to add creative touches that reflect your personal style and enhance your bedroom decor. Consider incorporating unique materials, textures, or embellishments to make your headboard truly one-of-a-kind.
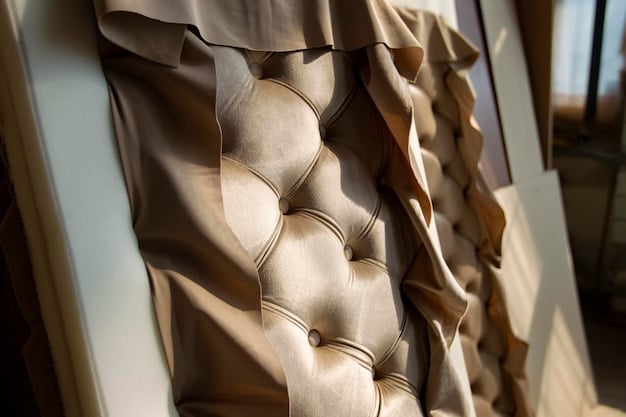
Think about adding decorative elements such as nailhead trim, buttons, or tufting for a more luxurious look. These details can elevate the appearance of your headboard and give it a high-end feel without the high-end price tag. You could also experiment with different fabric patterns and textures to create visual interest and depth.
Adding Unique Elements
Here are some ideas to spark your creativity:
- Repurposed Materials: Use reclaimed wood, old doors, or even vintage textiles for a unique, eco-friendly design.
- Paint and Stencils: Add patterns, quotes, or images using paint and stencils for a personalized touch.
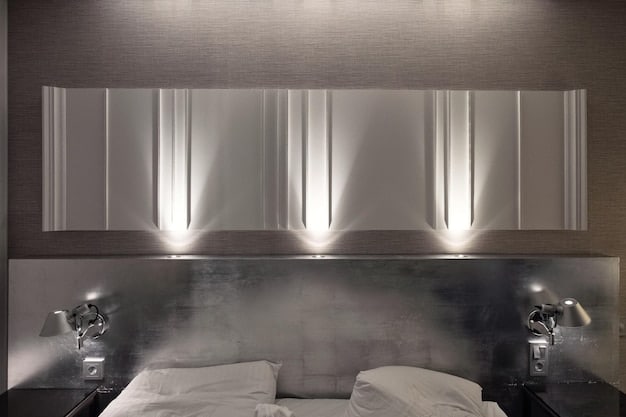
- Lighting: Incorporate LED strip lights or sconces into your headboard for added functionality and ambiance.
- Storage: Build shelves or compartments into your headboard for convenient bedside storage.
By incorporating these creative touches, you can transform your DIY headboard into a focal point that truly reflects your personality and style. Don’t be afraid to experiment and think outside the box – the possibilities are endless!
Finishing Up: Mounting and Final Adjustments
Once your DIY headboard is fully constructed and customized, the final step is to mount it to your bed frame or wall. Proper mounting is essential to ensure the headboard is stable and secure. There are several methods you can use, depending on your bed frame and the design of your headboard.
If your bed frame has headboard brackets, you can simply attach the headboard to the frame using bolts and nuts. Make sure the headboard is aligned properly and the bolts are tightened securely. If your bed frame doesn’t have brackets, you can purchase universal headboard mounting brackets at most hardware stores. Alternatively, you can mount the headboard directly to the wall using French cleats or heavy-duty brackets.
Once the headboard is mounted, take a step back and assess the overall look. Make any final adjustments as needed. Ensure that the headboard is level and that all hardware is tightened securely. If you’ve added any decorative elements, make sure they are properly attached and aligned.
Final Touches for Perfection
To ensure your headboard looks its best, consider these finishing touches:
- Clean Up: Wipe down the headboard with a damp cloth to remove any dust or debris.
- Check Stability: Give the headboard a gentle push to ensure it is stable and secure.
- Add Bedding: Style your bed with your favorite bedding to complete the look.
With these final touches, your DIY headboard will not only enhance the style of your bedroom but also provide a comfortable and inviting place to rest. Enjoy the satisfaction of knowing you created something beautiful and functional with your own hands!
Maintaining Your DIY Headboard
Prolonging the life and look of your do-it-yourself (DIY) headboard involves consistent maintenance and prompt awareness of any possible damages. With proper care, you can keep your handmade item looking its best for many years to come. Establishing a regular cleaning routine and taking preventative measures against everyday wear and tear is crucial to maintaining the cleanliness and aesthetics of your headboard.
Start by cleaning regularly; the frequency depends on the fabric and the extent of usage. For cloth headboards, get rid of dust and crumbs by vacuuming them regularly with a brush attachment. Spot-clean any stains with a gentle cloth, mild soap, and water. Clean wooden headboards with a light, wet cloth, then dry it for best results. Make sure there are no harsh chemicals that can damage the surface of the headboard.
To keep any potential damage to a minimum, stay away from direct sunlight, which can cause fabric to fade and age prematurely. If your headboard is susceptible to sunlight, consider placing a few curtains or shades over it. Be careful around sharp objects and rugged clothes that can scratch the surface or snag the fabric. To avoid warping, use furniture polish or wood conditioner on wooden headboards, according to the recommendations made on the product packaging.
In summary, a little attention in terms of maintenance ensures that your DIY headboard remains an attractive and long-lasting feature in your bedroom. Cleaning regularly, keeping direct sunlight out, and taking prompt actions to fix issues can improve its longevity and condition.
| Key Point | Brief Description |
|---|---|
| 🔨 Cost Savings | DIY headboards are much cheaper than store-bought options. |
| 🎨 Customization | Design your headboard to perfectly match your personal style. |
| 🛠️ Material Choice | Opt for affordable materials like plywood, fabric remnants, and foam. |
| 💡 Creative Touches | Add unique elements like lighting, storage, or repurposed materials. |
FAQ
▼
You’ll need basic tools such as a saw, staple gun, measuring tape, pencil, and possibly a drill, depending on how you plan to mount it. Consider safety glasses and gloves too.
▼
Use affordable materials like plywood, repurposed fabrics, and inexpensive foam padding. Look for sales, coupons, and discounts at local craft stores.
▼
Upholstery fabric is a durable choice. If you’re on a budget, consider canvas or even repurposed textiles like old blankets for a unique look.
▼
If your bed frame has headboard brackets, you can attach the headboard using bolts and nuts. Otherwise, use universal headboard mounting brackets from a hardware store.
▼
Yes, incorporating LED strip lights or sconces can add functionality and ambiance. Just be sure to plan for the wiring and installation during the construction process.
Conclusion
Creating a DIY headboard is a wonderful way to inject personality into your bedroom while staying within a budget. By carefully planning your design, selecting affordable materials, and adding creative touches, you can craft a unique and stylish headboard that transforms your space. This project offers not only cost savings but also the satisfaction of making something beautiful with your own hands.


