DIY Shiplap Accent Wall: Add Character Under $80
Anúncios
Transform your living space with a stylish DIY shiplap accent wall, achieving a custom, character-rich look for under $80 using affordable and readily available materials.
Looking to add a touch of character to your home without breaking the bank? Creating a DIY shiplap accent wall for under $80 is an achievable and satisfying project that can dramatically transform any room.
Anúncios
Why Shiplap? The Charm of a DIY Accent Wall
Shiplap accent walls have surged in popularity, becoming a go-to choice for homeowners seeking to add texture, depth, and character to their spaces. But what makes shiplap so appealing, and why should you consider it for your next DIY project?
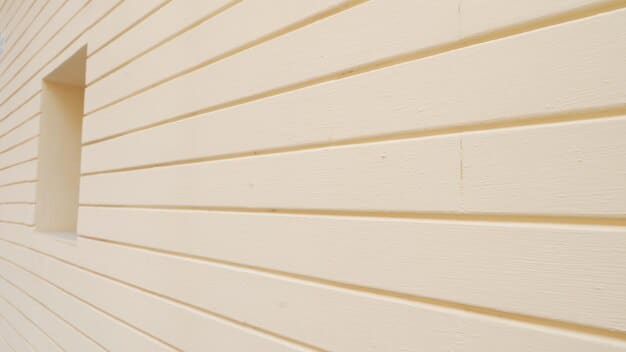
Shiplap, traditionally used as exterior siding for barns and coastal homes, brings a touch of rustic charm with a modern twist. It’s the perfect way to create a focal point in any room, adding visual interest and a sense of warmth.
Anúncios
The Versatility of Shiplap
One of the best things about shiplap is how versatile it is. It can be painted any color to match your existing decor, stained for a more natural look, or even left unfinished for a raw, rustic feel. Whether your style is farmhouse, coastal, modern, or eclectic, shiplap can be adapted to suit your aesthetic.
Budget-Friendly Upgrade
Unlike some home improvement projects that require expensive materials and professional installation, a shiplap accent wall can be surprisingly affordable. By using inexpensive materials like plywood or MDF, and tackling the project yourself, you can achieve a high-end look without breaking the bank.
- Easy to Install: Shiplap is relatively easy to install, even for beginners.
- Adds Value: A well-designed accent wall can increase your home’s value.
- Customizable: Paint, stain, or leave it raw to match your décor.
- Hides Imperfections: A shiplap wall can cover up uneven surfaces.
In summary, shiplap is a fantastic option for anyone looking to add character, style, and value to their home on a budget. With its versatility, ease of installation, and timeless appeal, it’s no wonder shiplap accent walls have become a favorite among DIY enthusiasts.

Planning Your Shiplap Accent Wall: Materials and Tools
Before diving into your DIY shiplap accent wall project, careful planning is essential. This includes gathering the right materials and tools to ensure a smooth and successful installation. Here’s a comprehensive guide to help you get started.
First, you’ll need to measure the wall where you plan to install the shiplap. Calculate the square footage to determine how much material you’ll need. It’s always a good idea to add an extra 10% to account for waste.
Essential Materials
The key to keeping this project under $80 is choosing affordable materials. Here’s what you’ll need:
- Plywood or MDF Boards: These are the most cost-effective options for creating shiplap planks.
- Construction Adhesive: This will help secure the boards to the wall.
- Nails or Screws: For added stability.
- Paint, Stain, or Primer: Depending on your desired finish.
- Wood Filler: To fill nail holes and imperfections.
Essential Tools
Having the right tools on hand will make the installation process much easier and faster. Here’s a list of the tools you’ll need:
- Measuring Tape: For accurate measurements.
- Level: To ensure the boards are straight.
- Saw: To cut the boards to size (a circular saw or miter saw works best).
- Nail Gun or Drill: To secure the boards to the wall.
- Caulk Gun: To apply construction adhesive.
- Sanding Block or Power Sander: To smooth the edges of the boards.
By gathering all your materials and tools in advance, you’ll be well-prepared to tackle your DIY shiplap accent wall project with confidence. Proper planning can save you time, money, and frustration, ensuring a beautiful and professional-looking finished product.
Step-by-Step Guide: Installing Your Shiplap Wall
Now that you have all your materials and tools ready, it’s time to start the installation process. Follow these step-by-step instructions to create your own stunning shiplap accent wall.
A clean, smooth, and level surface is crucial for a professional-looking shiplap wall. Start by patching any holes or imperfections with wood filler and sanding the wall smooth. Use a level to ensure your starting point is perfectly straight.
Step 1: Preparing the Boards
Cut your plywood or MDF boards into planks of the desired width. A common size is 6 inches, but you can customize this to suit your preferences. Sand the edges of each plank to remove any rough spots.
Step 2: Installing the First Row
Apply construction adhesive to the back of the first plank and position it along the bottom of the wall. Use a level to ensure it’s perfectly straight, and then secure it with nails or screws. This first row is critical, as it sets the foundation for the entire wall.
Step 3: Adding Subsequent Rows
Use spacers (coins, popsicle sticks, or shims) to create consistent gaps between each plank. Apply adhesive to the back of the next plank, position it above the first row, and secure it with nails or screws. Repeat this process until you reach the top of the wall.
- Stagger the Seams: Similar to laying hardwood floors, stagger the seams of the shiplap planks for a more visually appealing and professional look.
- Use a Level Frequently: Double-check with your level every few rows to ensure the wall stays straight.
- Cut Around Obstacles: Measure and cut the planks to fit around outlets, switches, and other obstacles.
By following these steps carefully, you can create a beautiful shiplap accent wall that adds character and style to your home. Take your time, pay attention to detail, and don’t be afraid to make adjustments as you go.
Finishing Touches: Painting and Sealing
Once your shiplap wall is installed, the finishing touches will bring it to life. Painting or staining your shiplap not only enhances its appearance but also protects the wood from moisture and wear. Here’s how to achieve a flawless finish.
Painting shiplap allows you to customize the look and feel of your wall to perfectly match your existing decor. From bright, bold colors to subtle, muted tones, the possibilities are endless. Consider a classic white for a clean, timeless look or a soft gray for a modern, sophisticated feel.
Choosing Your Paint
When selecting paint for your shiplap wall, opt for a high-quality latex paint with a satin or semi-gloss finish. These finishes are durable, easy to clean, and provide a subtle sheen that enhances the texture of the wood.
The Painting Process
Start by priming the shiplap with a good-quality primer. This will help the paint adhere better and provide a more uniform finish. Apply the primer in thin, even coats, using a brush or roller. Once the primer is dry, lightly sand the surface to remove any imperfections.
- Apply Thin Coats: Apply the paint in thin, even coats to avoid drips and runs.
- Use a Brush for Details: Use a brush to paint the gaps between the planks for a professional look.
- Allow for Drying Time: Allow each coat of paint to dry completely before applying the next coat.
With a little patience and attention to detail, you can achieve a beautiful and durable finish that will enhance the look of your shiplap accent wall for years to come.
Design Ideas: Shiplap in Different Rooms
One of the great things about shiplap is that it’s incredibly versatile and can be used in virtually any room of your home. Whether you’re looking to add a rustic touch to your living room, create a cozy bedroom retreat, or enhance the charm of your bathroom, shiplap can be adapted to suit your style and needs.
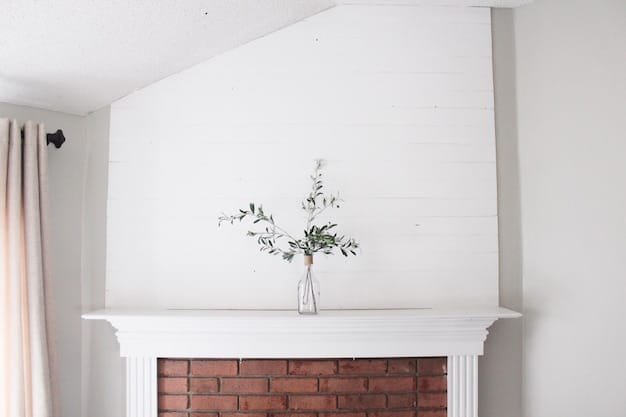
In the living room, a shiplap accent wall can serve as a stunning focal point. Use it to highlight your fireplace, anchor your sofa, or create a backdrop for your entertainment center. Paint it a neutral color for a subtle, sophisticated look, or go bold with a vibrant hue to make a statement.
Shiplap in the Bedroom
In the bedroom, shiplap can create a cozy and inviting atmosphere. Use it as a headboard wall to add texture and depth, or install it on all four walls for a warm, cabin-like feel. Soft, muted colors like pale blue, lavender, or cream can enhance the relaxing vibe.
Shiplap in the Bathroom
Shiplap can add a touch of rustic elegance to your bathroom. Use it as a wainscoting to protect the walls from moisture, or install it behind the vanity to create a stylish focal point. Paint it a crisp white or a nautical blue for a fresh, coastal vibe.
- Kitchen: Use shiplap as a backsplash for a farmhouse-inspired look.
- Entryway: Create a welcoming first impression with a shiplap accent wall.
- Home Office: Add character and style to your workspace with a shiplap feature wall.
No matter where you choose to install it, shiplap is a fantastic way to add character, style, and value to your home. Let your creativity guide you, and don’t be afraid to experiment with different colors, textures, and designs to create something truly unique.
Troubleshooting: Common Shiplap Installation Issues
Even with careful planning and preparation, you may encounter some challenges during your shiplap installation. Here are some common issues and how to address them to ensure a successful project.
One of the most common issues is uneven walls. If your walls aren’t perfectly straight, the shiplap planks may not sit flush against the surface, creating gaps and an uneven appearance. Use shims to level the planks and create a uniform surface.
Dealing with Gaps
Small gaps between planks are normal and can add to the rustic charm of shiplap. However, larger gaps can be unsightly and may require some attention. Use wood filler to fill the gaps, sand smooth, and then paint or stain to match the rest of the wall.
Cutting Around Obstacles
Cutting shiplap planks to fit around outlets, switches, and other obstacles can be tricky. Measure carefully and use a jigsaw or coping saw for precise cuts. Consider using outlet extenders to bring the outlets flush with the new wall surface.
- Warped Boards: Choose straight boards and store them flat before installation.
- Nail Pops: Countersink nails slightly and fill the holes with wood filler.
- Paint Problems: Use a primer and high-quality paint for best results.
By addressing these common issues proactively, you can overcome challenges and create a beautiful, professional-looking shiplap accent wall that you’ll be proud of for years to come.
| Key Point | Brief Description |
|---|---|
| 🔨 Planning & Materials | Accurate measurements and affordable materials like plywood are essential. |
| 🛠️ Installation Process | Start with a level surface, stagger seams, and use spacers. |
| 🎨 Finishing | Primer helps and applying thin paint coats will result in the best look. |
| 💡 Room Ideas | Shiplap can enhance living rooms, bedrooms, and bathrooms with the appropriate finish. |
FAQ
▼
Shiplap is a type of wooden board that is commonly used as exterior siding for buildings. It’s characterized by its rabbeted edges, which allow the boards to overlap and create a tight, weatherproof seal. It has become a popular choice for interior walls, adding texture and dimension to any space.
▼
Yes, it’s entirely possible to install shiplap for under $80 by being strategic about your material choices. Opting for inexpensive materials like plywood or MDF, buying in bulk, and DIY-ing the installation can significantly reduce costs.
▼
Essential tools include a measuring tape, level, saw, nail gun or drill, caulk gun, and sanding block. Having these tools on hand will ensure a smooth and efficient installation process. Don’t forget safety goggles and gloves for protection!
▼
Consider the overall style and color palette of your room. Neutral colors like white, gray, and beige are versatile and timeless choices, while bolder colors can make a statement. Test paint samples on a small area of the shiplap to see how they look in different lighting conditions.
▼
Regular dusting and occasional cleaning with a damp cloth will help keep your shiplap wall looking its best. Avoid using harsh chemicals or abrasive cleaners, as these can damage the finish. Touch up any scratches or chips with paint as needed.
Conclusion
Creating a DIY shiplap accent wall for under $80 is a rewarding project that can dramatically transform your living space. With careful planning, affordable materials, and a little elbow grease, you can achieve a custom, character-rich look without breaking the bank. So gather your tools, unleash your creativity, and get ready to add a touch of timeless charm to your home!


